


How to Remove White Backgrounds from Product Photos With AI
A white rectangle around a product is easy to miss until you place the image on a cream website, a dark advertisement, or a coloured presentation slide. The product may look neatly isolated, but the background is still part of the file.
To remove white background from product photos, use a background-removal tool to separate the product from its surroundings, inspect the cutout, and export a file that retains transparency. Then reopen that downloaded file over a contrasting colour. That last check matters: an attractive preview does not prove that the export contains a transparent background.
This guide explains how to prepare the source photo, protect the product’s details, check difficult edges, and keep a reusable transparent master. The goal is a cleaner presentation of the item you actually sell.
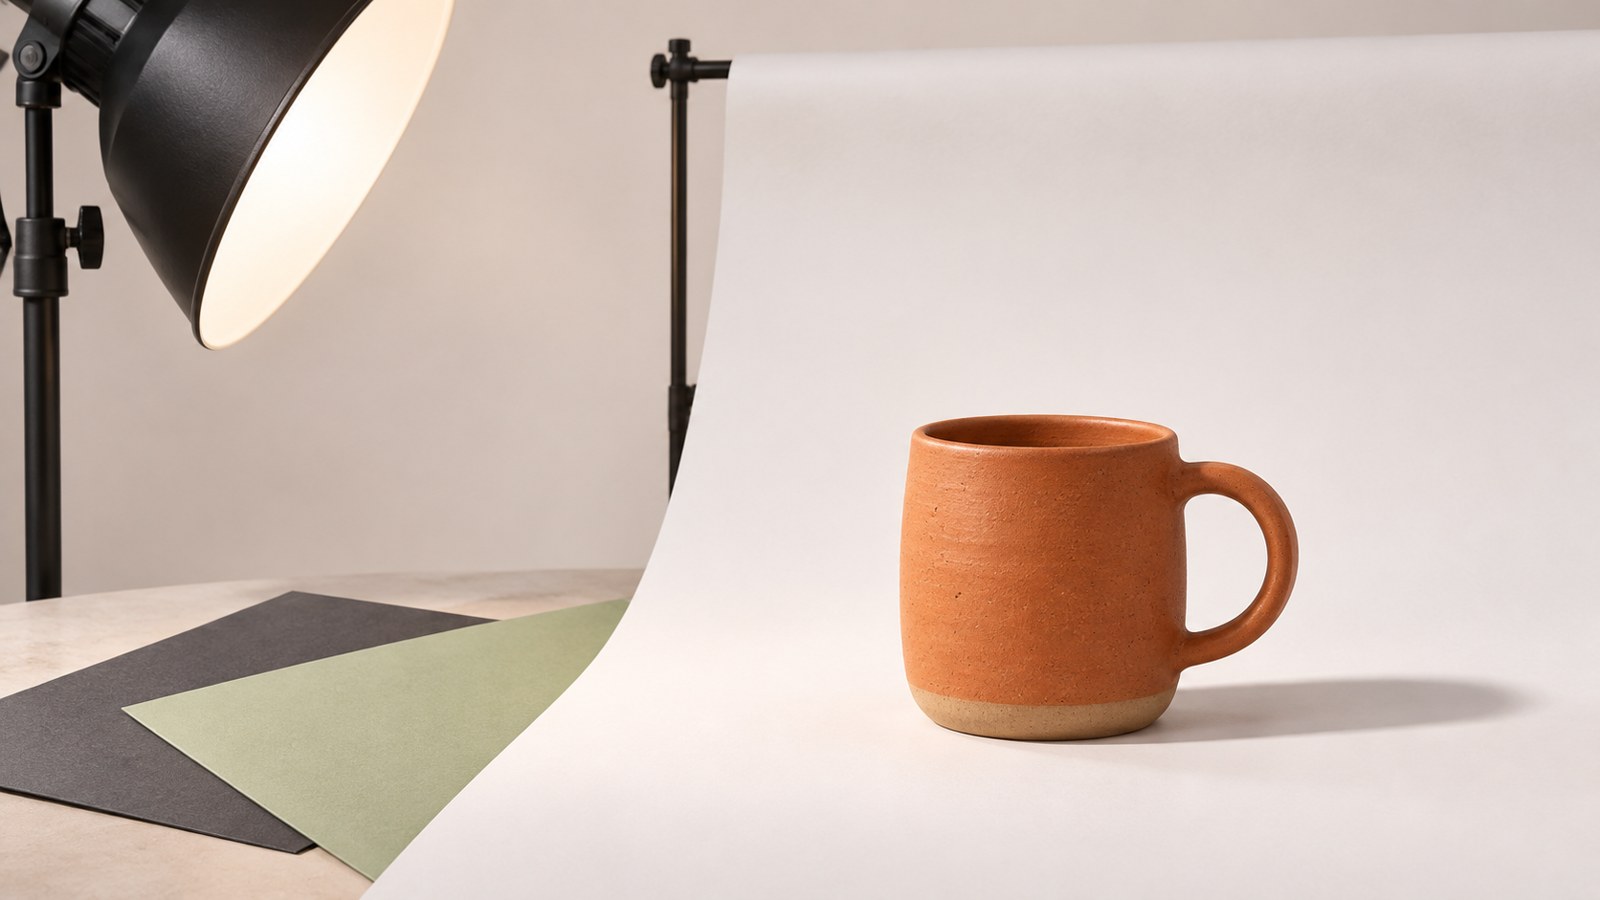
Editorial illustration; not a photographed SKU or a demonstration of an ImagineLab editing result.
Decide what you want to remove
Three requests can sound similar while producing different files.
| Your goal | What the finished file needs | What to check |
|---|---|---|
| Remove the white background | Transparent areas outside the product | The downloaded cutout reveals a coloured layer beneath it |
| Make a background pure white | An opaque white canvas | White extends to the image boundary without unwanted patches |
| Replace white with a lifestyle scene | A new visible background | The product still matches the original photograph |
For a reusable cutout, choose the first outcome. You can later place it on a white canvas, a coloured advertisement, or another composition. Starting with a flattened white image limits those options.
Transparency is stored as image data, not as a visible pattern. PNG supports transparency through an alpha channel or transparency information, but the PNG extension alone does not guarantee that a particular image has transparent pixels. The PNG specification describes how that information is represented.
A grey checkerboard usually helps an editor display empty areas. If the squares remain visible when you place the image over a coloured layer, they may have been painted into the picture. That is a failed cutout, even if it looks convincing in a preview.
Before you begin: prepare a photo worth cutting out
Use the original photograph you own or have permission to edit. Keep an untouched copy. A screenshot from a product page may already have been resized, compressed, or sharpened, making small details harder to judge.
Choose a photo with the entire product in frame and enough space around it to inspect the outline. Check focus on the parts that matter to a buyer: the label, fasteners, material texture, opening, or handle. Background removal cannot recover information that the photograph never captured.
Start with one representative product before processing a whole catalogue. A dark carton against white tests a straightforward edge. A pale object with a handle tests whether the tool keeps the object while removing the background inside its openings. Glass and translucent packaging require a separate judgement because some of the background is visible through the product itself.
Decide whether you want to keep a cast shadow. A reusable cutout without a floor shadow gives you flexibility, while a retained shadow may anchor the product on a similar surface. Neither choice is automatically correct. Make it deliberately and record it so later images follow the same treatment.
How to remove white background from product photos: the workflow
1. Start from the existing image in Image Lab
Open ImagineLab Image Lab and sign in. If you generated the source there, stay in that image’s thread and click AI Edit beneath the image. The AI Image Editing panel opens with the selected picture under SOURCE. For an existing photograph, use Upload or Change in that source area and confirm that the correct picture appears.
In this walkthrough, the mug was generated with GPT Image 2.5 in the browser, then opened through its own AI Edit button. The bottle was an earlier ImagineLab-generated sample loaded through Change. Both are synthetic demonstration images, not photographs of merchandise offered for sale.
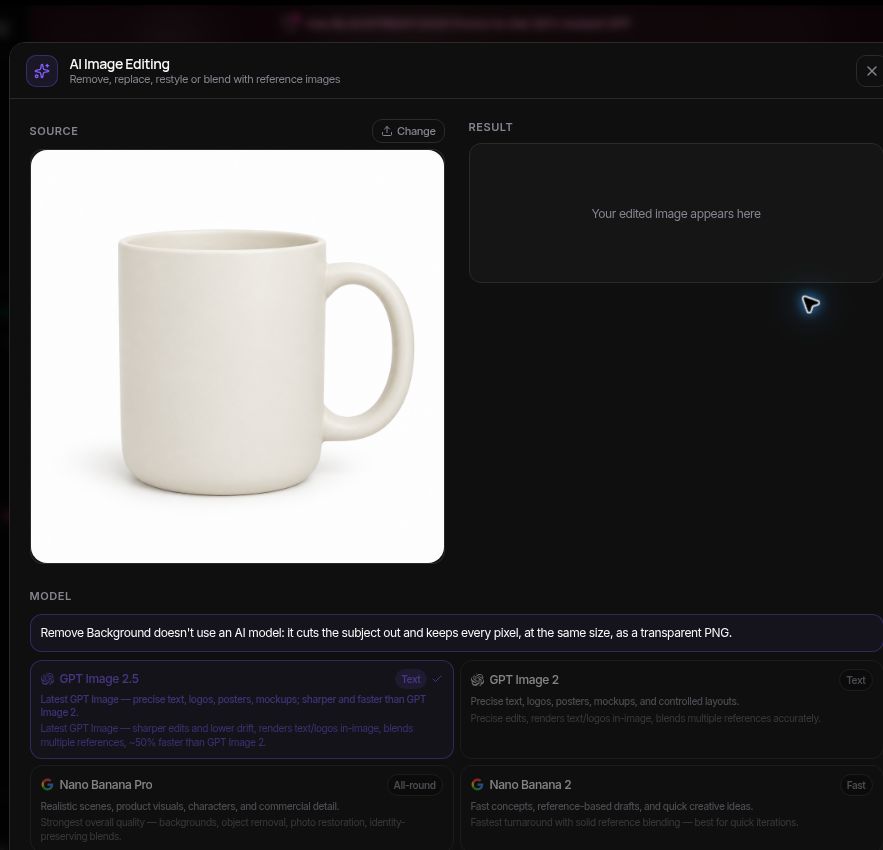
Screenshot 1: the selected mug is carried into AI Image Editing. The panel identifies the dedicated background-removal route.
2. Choose Remove Background under Quick Edits
Select Remove Background, rather than Replace Background. In the tested interface, this switches to a dedicated cutout operation. The panel explicitly says that this operation does not use the selected generative AI model: it keeps the source pixels and returns a same-size transparent PNG. GPT Image 2.5 created the mug input; the separate Background Remover made the cutout.
The preset populated the instruction field with:
Remove the background completely. Keep only the main subject, cleanly cut out, on a plain transparent background.
Keep PNG selected under EXPORT FORMAT. Click Remove background, review the displayed credit cost, and confirm Remove. Each removal in this test cost 1 EDT; that is the observed charge on 22 November 2026, not a permanent price promise.
You do not need a long creative prompt for this dedicated operation. Asking a generative model to recreate the scene introduces unnecessary opportunities to change the product. For a separate generative edit, describe one change at a time and preserve the original for comparison. Our guide to controlled image-editing prompts develops that approach.
If you also need to remove unwanted text, the panel provides a separate Remove Text quick edit. Specify the location and preserve any label or logo that belongs to the product. This walkthrough did not test text removal, so it is not included in the two measured results below.
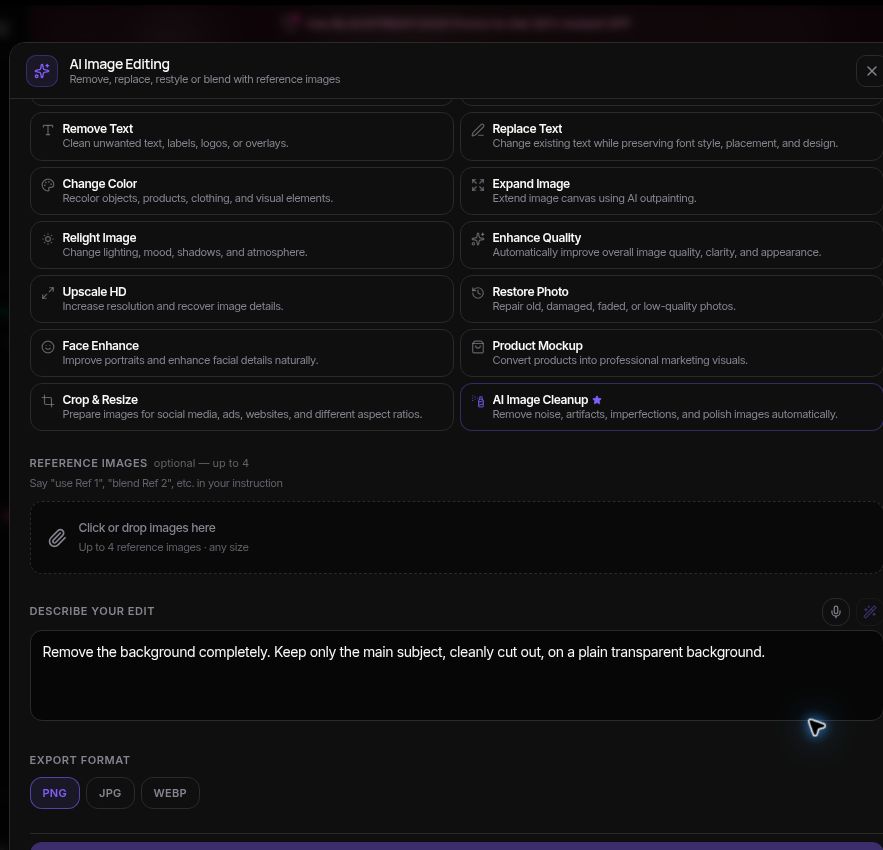
Screenshot 2: the removal instruction and PNG export setting. Other cleanup operations are separate choices.
3. Check that the product is still the same product
Compare the edited image with the original at a useful viewing size, then inspect important details at 100% zoom. Look at the silhouette, printed text, seams, corners, colour, and material texture.
A background edit that changes a label or rounds off a distinctive edge needs correction. Do not approve it simply because the overall image looks more polished. The photograph has a practical job: show the item a customer will receive.
For a bottle, inspect the cap, neck, label boundaries, and any transparent sections. For a shoe, inspect the laces, sole, stitching, and spaces between straps. For a mug, inspect both the outer handle and the hole inside it. These small areas often reveal whether the background was separated cleanly.
If the model has reconstructed part of the product, return to the source. Where possible, refine a selection or mask while retaining the original product pixels. Repeated generation can make the picture look smoother while moving it further away from the photograph.
4. Inspect the edge on light and dark backgrounds
Place the cutout over at least two temporary backgrounds: a dark one and a light one. Add the intended website or advertisement colour if it differs from both.
On dark backgrounds, look for a pale fringe around the item. On light backgrounds, look for dark debris, missing edges, or an overly hard outline. Inspect openings and narrow gaps separately; they can retain pieces of the original white backdrop even when the outer silhouette looks clean.
Do not delete every white pixel. White paint, paper, fabric, reflections, and highlights can belong to the product. An aggressive colour-based deletion may remove these along with the backdrop.
For minor edge errors, use the editor’s available mask-refinement controls. Restore missing product areas before removing stray background. Make small adjustments and compare at normal display size as well as close up. A heavily feathered outline may hide a rough selection but make a solid product look soft or translucent.
5. Download the transparent master
When the cutout appears under RESULT, use the result’s Download control or Download .png. Keep the PNG master separate from any later white-background JPEG. Renaming a JPEG to .png does not add transparency.
Record the dimensions of the saved file. Both files in this test remained 1024 × 1024 pixels, matching their sources. Exporting a larger file would not restore details absent from the original photograph.
6. Reopen the downloaded file and verify it
Close the preview and open the actual downloaded PNG in an editor. Place a solid-colour layer underneath it. The new colour should appear in the surrounding background and in genuinely open spaces within the product.
If the file contains a white rectangle, transparency was not preserved. If it contains a checkerboard rectangle, the pattern is part of the picture. Return to the export settings or choose a workflow that supports the required output.
Where an alpha inspector is available, check the transparency data as well. For an 8-bit alpha channel, fully transparent pixels have a value of 0 and fully opaque pixels have a value of 255; edge pixels can have intermediate values. An alpha channel filled entirely with opaque values does not establish background removal.
A numeric alpha check cannot tell you whether the right pixels were removed. A file can contain transparent pixels while still missing half a handle. Use the data check and the visual comparison together.
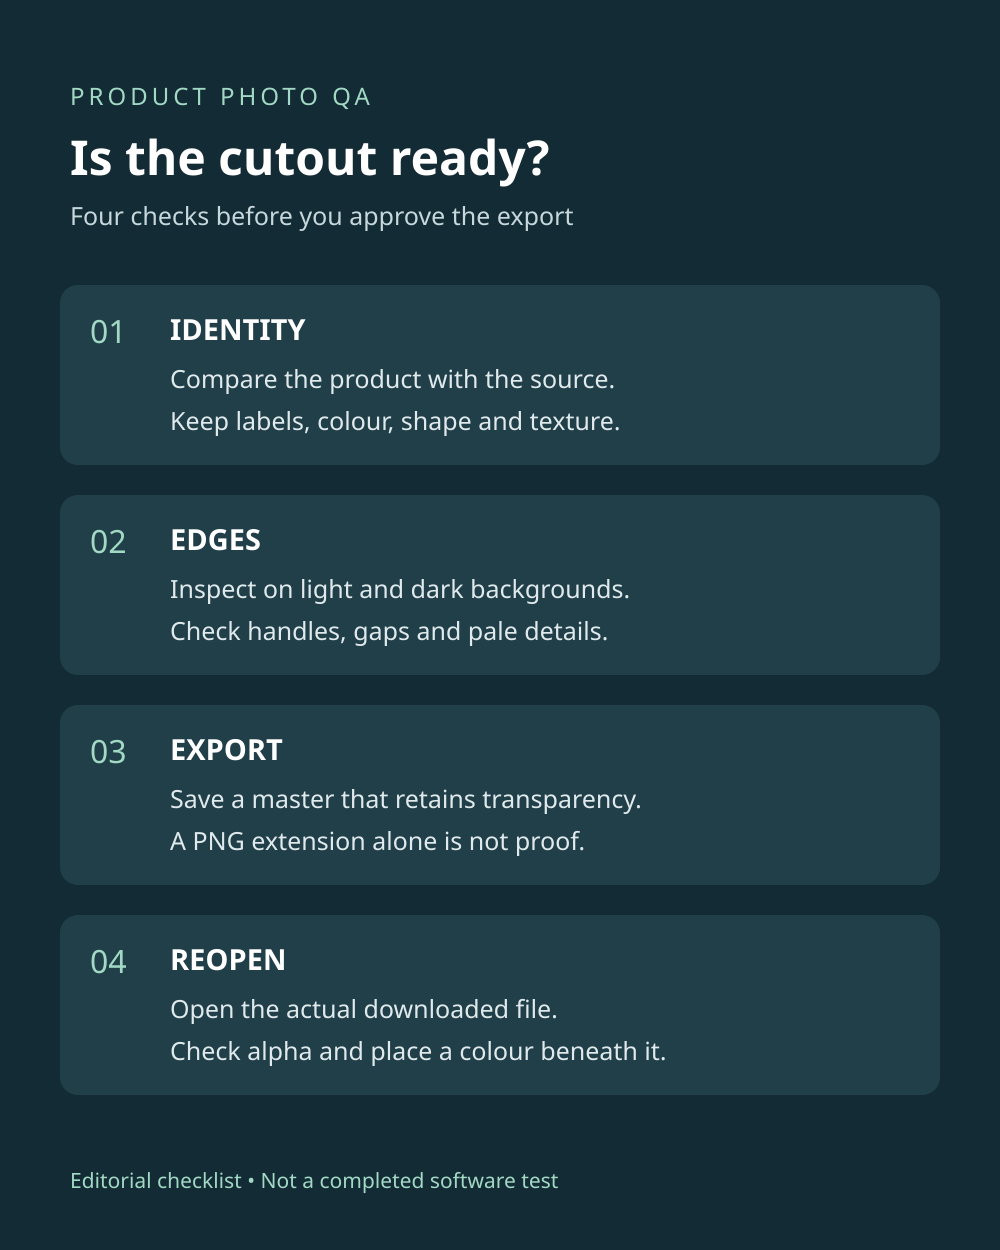
Editorial QA checklist. This diagram explains the checks; it does not represent a completed product test.
Two product samples: what the saved files showed
The signed-in workflow was checked on 22 November 2026 using an ivory mug and a blue bottle with a black cap. Both sources were created in ImagineLab specifically for demonstration. The mug was generated with GPT Image 2.5 and edited from that image’s thread. The bottle came from an earlier FLUX.2 Pro generation and was loaded into the same editing panel through Change.
Both dedicated Remove Background outputs were genuine RGBA PNGs. A pixel comparison found that every RGB value matched the corresponding source image; the cutout operation changed transparency rather than redrawing the product. The canvas dimensions also remained unchanged. That is a stronger preservation check than deciding that two thumbnails look similar.
| Check | Ivory mug | Blue bottle |
|---|---|---|
| Saved dimensions | 1024 × 1024 | 1024 × 1024 |
| Genuine alpha channel | Yes, values 0–255 | Yes, values 0–255 |
| Fully transparent pixels | 660,563 | 814,630 |
| Source RGB values preserved | All matched exactly | All matched exactly |
| Visual inspection | Handle opening cleared; ivory finish and outline retained | Blue finish, black cap and silhouette retained |
The RGB comparison proves that the colour information was preserved, but the alpha mask still determines how edges look on a new background. Some retained pixels are partly transparent. Inspect the final placement at full size, especially around pale edges and the bottle’s cap. These two controlled examples do not establish performance on glass, hair, jewellery or a whole catalogue.
Mug: remove the white inside the handle too
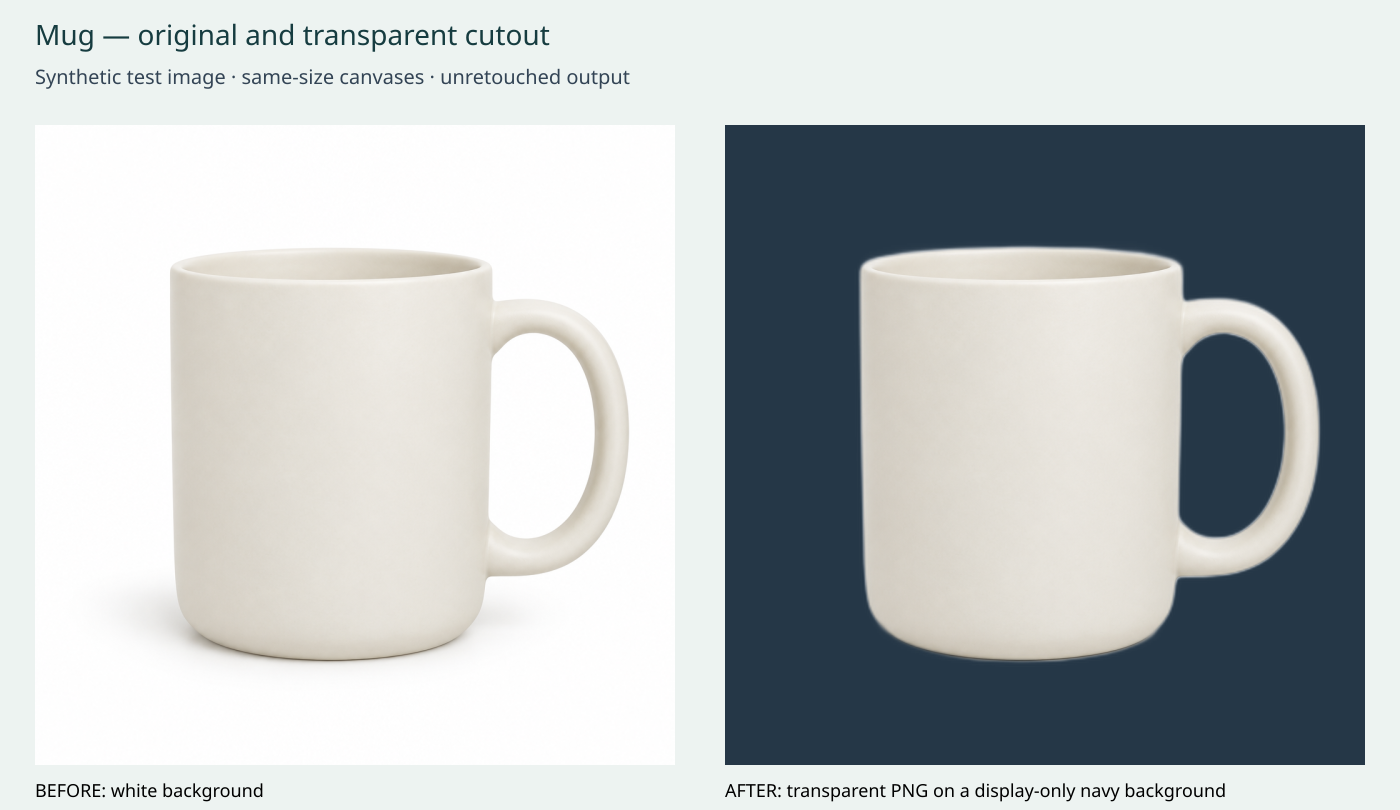
Before/after 1: the entire original and output canvases are shown at the same scale. Navy is a display layer beneath the transparent PNG, not a generated replacement background. The handle opening is transparent; the mug itself has not been redrawn.
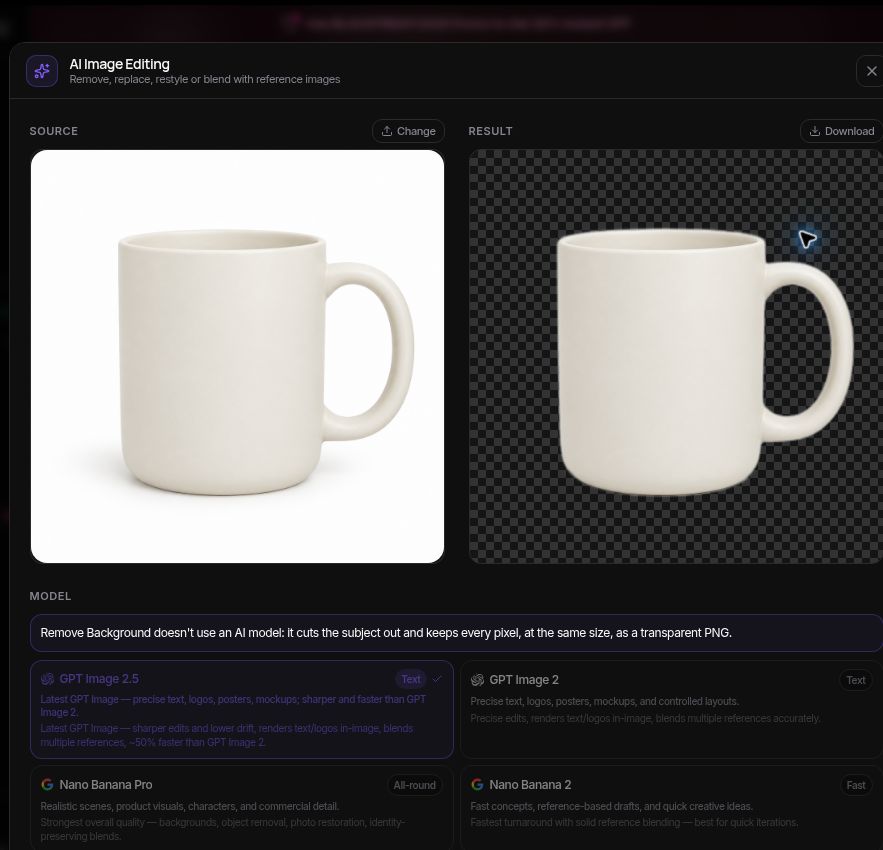
Screenshot 3: the actual mug source and result inside ImagineLab AI Image Editing.
Bottle: preserve the cap, colour and shape
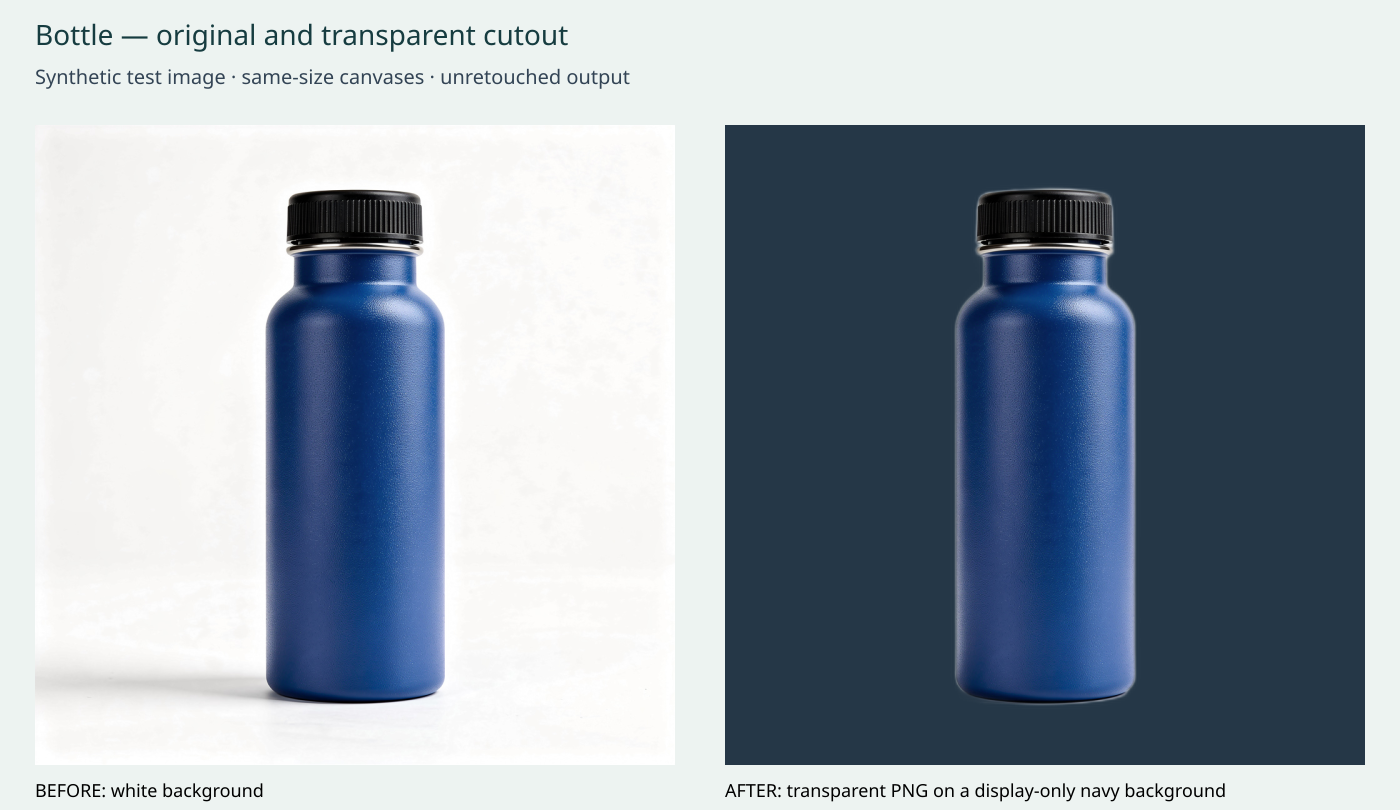
Before/after 2: the same blue bottle and black cap, with the backdrop removed. Original and result are shown at equal canvas scale; no corrective retouching was applied.
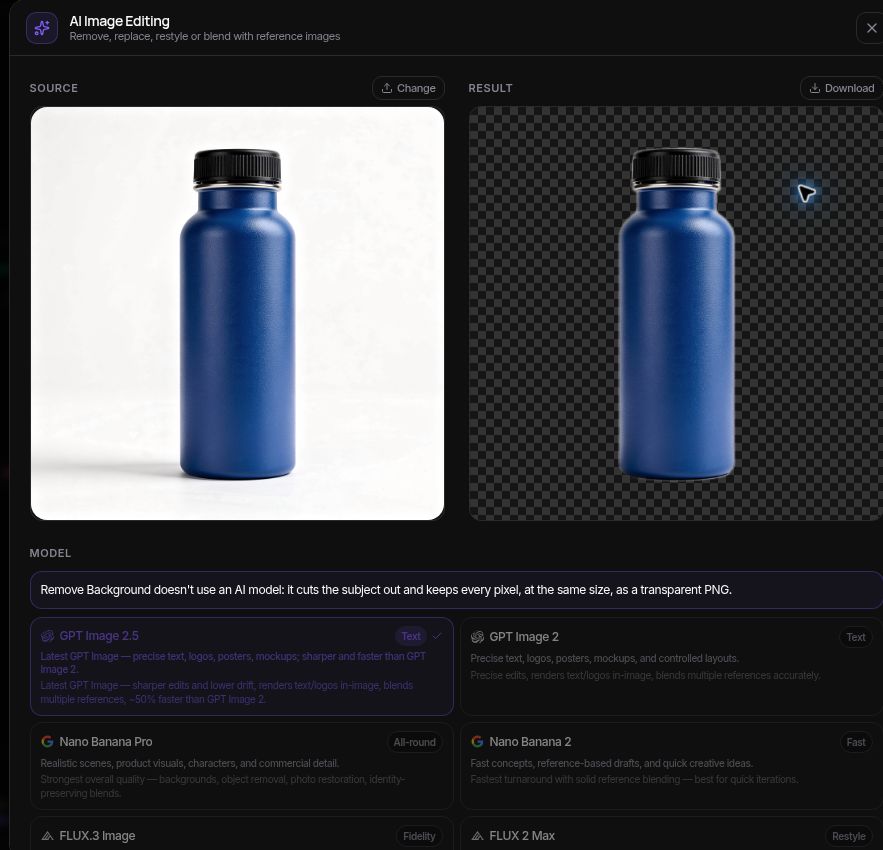
Screenshot 4: the bottle result in the same editor. Transparency was checked in the saved PNG, beyond the checkerboard preview.
Troubleshooting the results that look almost right
| Problem | What to inspect | What to do next |
|---|---|---|
| White rectangle remains | Actual downloaded file, not just the preview | Remove any background layer and export with transparency enabled |
| White halo around the product | Edge against a dark colour | Refine the mask and inspect retained background contamination |
| Pale product parts disappear | White regions in the original | Restore the product in the mask; avoid deleting by colour alone |
| Handle or strap gaps stay white | Interior openings at close zoom | Remove the trapped background locally |
| Label or logo changes | Side-by-side comparison with the source | Reject the regenerated detail and return to original product pixels |
| Glass looks like a solid cutout | Reflections, tint, and transmitted background | Treat it as a specialist masking/compositing problem |
| Shadow looks dirty on a new colour | Grey patch or old surface retained underneath | Separate, remove, or rebuild the shadow deliberately |
| Export is smaller than expected | Downloaded dimensions | Inspect export limits and settings before resizing |
Glass deserves particular care. Removing everything that resembles the backdrop can also remove the visual cues that make the object look transparent. A single packshot may not provide a clean, reusable glass cutout for every possible background. If the required placement exposes obvious errors, manual retouching or a new photograph may be the better choice.
Likewise, a badly blurred edge is a source-image problem as well as a masking problem. Repeated prompts are not always the most efficient fix. A sharper source photograph can save more work than another round of cleanup.
Prepare the image for its actual destination
Keep the transparent master separate from the version you upload to a store or advertisement. Build the final composition at the required dimensions, choose the background intentionally, and inspect the product at the size visitors will see.
Check the destination’s current image rules before upload. A transparent asset is useful for design work, but it is not automatically the required format for every marketplace placement. Avoid applying one platform’s rules to every image in your catalogue.
If you are deciding between editors for a larger catalogue, our product-photo editor overview provides a starting point. Verify current export limits and features in the chosen product before committing a batch.
For batch work, approve a difficult sample as well as an easy one. Record the workflow, model or tool version where available, shadow decision, output dimensions, and inspection result. Consistency comes from repeating an approved process, not merely sending more images through the same button.
Common questions
Does a PNG file always have a transparent background?
No. A PNG can be entirely opaque. Open the downloaded file over a contrasting layer and inspect whether the surrounding area actually reveals that layer.
Can AI remove the background without changing the product?
That is the desired outcome, but it must be checked. Compare labels, shapes, colour, and small structural details with the source. A visually attractive result can still be unsuitable for a product listing.
Why does a white object disappear with the white background?
The edit may have treated pale product areas as background. Restore those areas using the original as a reference. If the source offers very little separation, reshooting with clearer edge lighting may help.
Should I keep a transparent version if I only need a white listing image?
Keep it if you expect to reuse the product in other designs. Create a separate opaque white version for the current listing and retain the transparent master for later work.
Approve the file, not just the preview
The reliable way to remove white background from product photos is to protect the product, inspect the outline, and verify the downloaded export. A cutout is ready when it keeps the item accurate, behaves properly on the intended background, and retains the transparency you asked for.
Save the source, editable project, and approved master together. That small habit makes the next colour variation, campaign layout, or catalogue update much easier to manage.
Start with one image in ImagineLab Image Lab, open AI Edit, and choose Remove Background. Keep the original beside the exported cutout until the final placement passes your checks.